Lightroom’s Transform tools provide a powerful solution to a common problem in photography: perspective distortion. Although often overlooked by casual editors, perspective distortion can have a significant impact on the overall quality of an image. It’s a subtle issue that, if left unaddressed, can detract from an otherwise outstanding photograph. Unfortunately, many photographers are unaware of how to identify the signs of perspective distortion or, more importantly, how to correct it.
What is the Lightroom Transform panel?

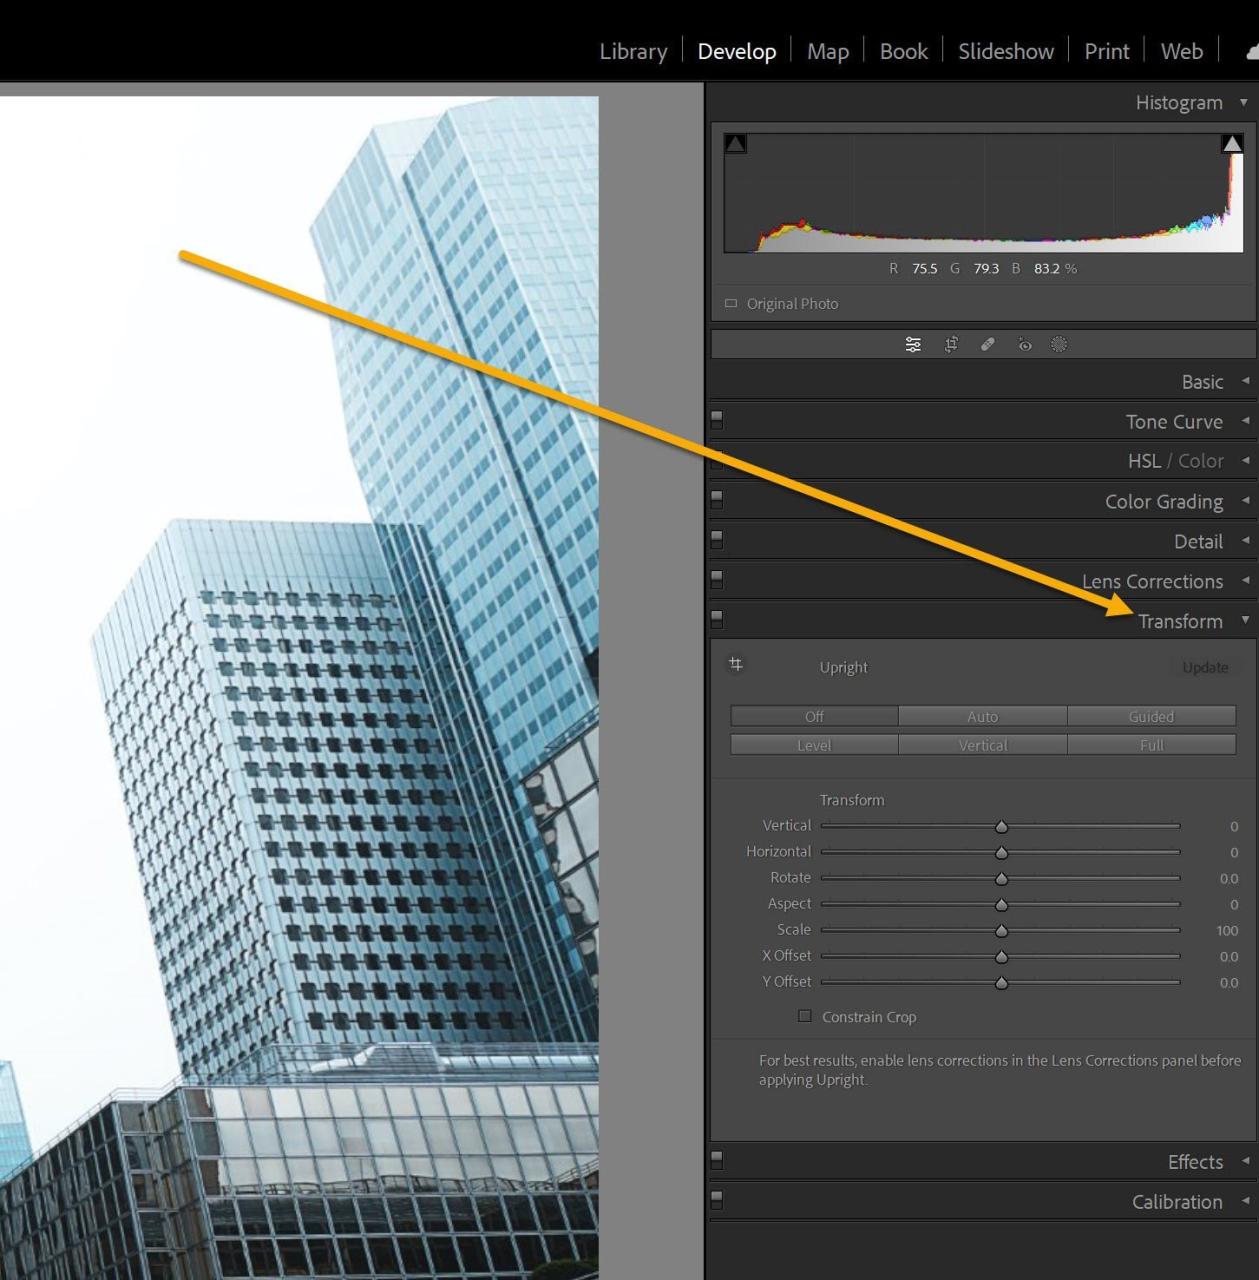
The Transform panel in Lightroom is a set of tools and sliders located in the Develop module. It is specifically designed to address perspective distortion issues in your photographs. The panel provides a range of adjustments that allow you to correct and transform the perspective of your images.
Within the Transform panel, you’ll find various options to correct perspective distortions caused by camera angles and positioning. These distortions can include converging verticals, leaning buildings, skewed horizons, or other perspective-related issues.
When should you use the Transform panel?
You should consider using the Transform panel in Lightroom whenever you encounter perspective distortion in your photos, particularly when there are noticeable vertical or horizontal lines. Perspective distortion can occur when photographing architecture, tall buildings, landscapes, or any scene where straight lines should appear parallel or perpendicular.

How to make use of the Transform panel The Transform sliders

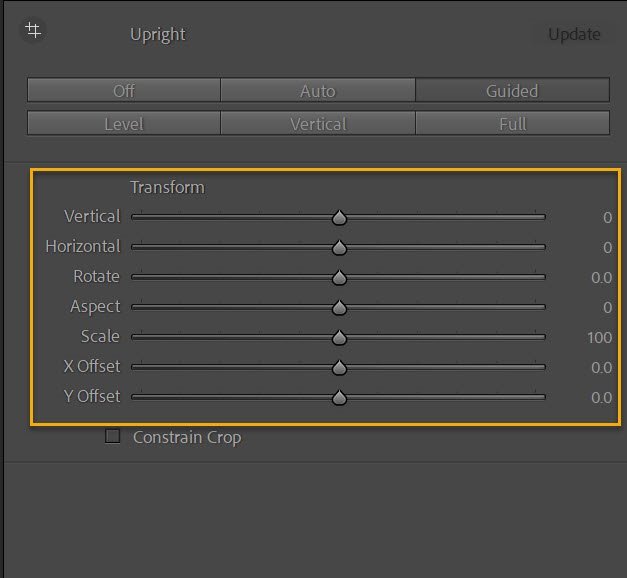
The Upright tools described above can remove distortion from the perspective quickly and efficiently. If you’d rather perform adjustments by hand or you aren’t satisfied with what you get from Upright tools Upright tools and would like to modify the result, Transform sliders can be a good alternative.
It is the Horizontaland Horizontalsliders are the most effective and permit you to rectify distortion across the horizontal and vertical and horizontal axes, respectively. If you’re faced with converging verticals just adjust the Vertical slider in any direction until the lines appear to be parallel. If you’re dealing with horizontal lines that are converging, adjust to adjust the Horizontal slider to the left instead.
Rotateslider Rotateslider lets you rotate your image. This could be an effective way to make sure that your photo is straight.
There’s also The Aspectslider that’s an effective way to control unneeded expansion or compression in your images after applying an additional distortion correction.
In the end, you’ll find three sliders: scale, X Offset along with the Y Offsetsliders that I almost do not employ (they basically crop your photos in certain ways). You are welcome to try these out but don’t be too surprised when you don’t use them often in the future.
If you use them on their own, you might be surprised to find that the sliders do not do the desired effect. But when they are they are used in conjunction and in small amounts it is possible to alter the sliders in order to achieve the view you imagine in your head’s eye.
Panel for Lightroom Transform: last words
Everything you require to know about how to correct distortion in perspective with Transform panel.
It’s likely that you’ll be able to easily transform your images in Lightroom However, I’d suggest you to choose some photos that have problems with perspective, and then check whether you can correct them. If you’re having trouble initially try not to quit; soon you’ll be able deal with distortion with the ease of a professional.
Here’s the next thing to do:
What do you think of when you utilize your Transform panel? Are you aware of any suggestions or tricks for enhancing your outcomes? Comment below with your suggestions. comments below!


