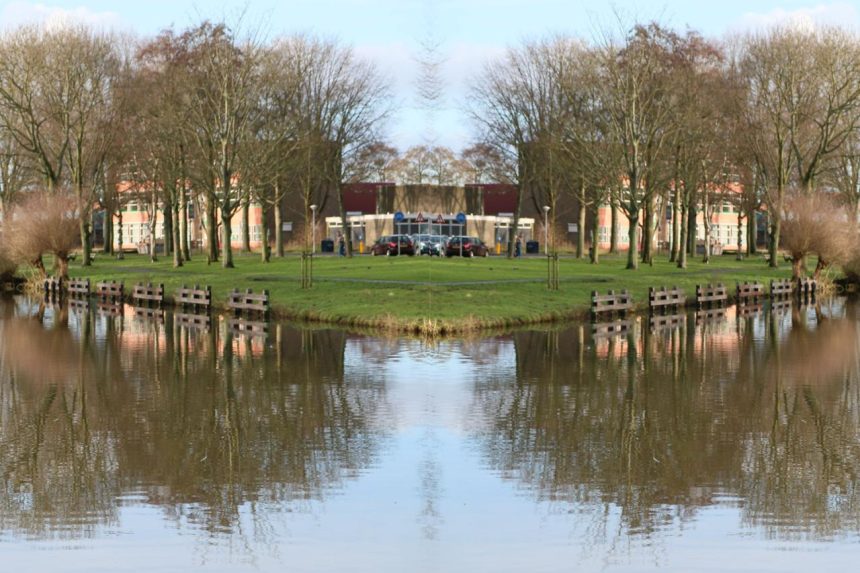
Mirroring an image in Photoshop is a common task for photographers and photo editors, whether it’s for creating photo composites, patterns, or meeting the graphic requirements of a project like a magazine or a poster.
If you find yourself needing to flip an image, don’t worry! I’ll guide you through the process step-by-step. Additionally, I’ll explain how you can leverage the mirror effect to create captivating patterns. So, if you’re interested, let’s dive right in and discover how to achieve these effects in Photoshop.
What is a Photoshop mirror effect?
The Photoshop mirror effect refers to the technique of flipping or mirroring an image horizontally or vertically to create a symmetrical or mirrored version of the original. This effect involves duplicating and reflecting one side of the image onto the other side, resulting in a visually striking and balanced composition.
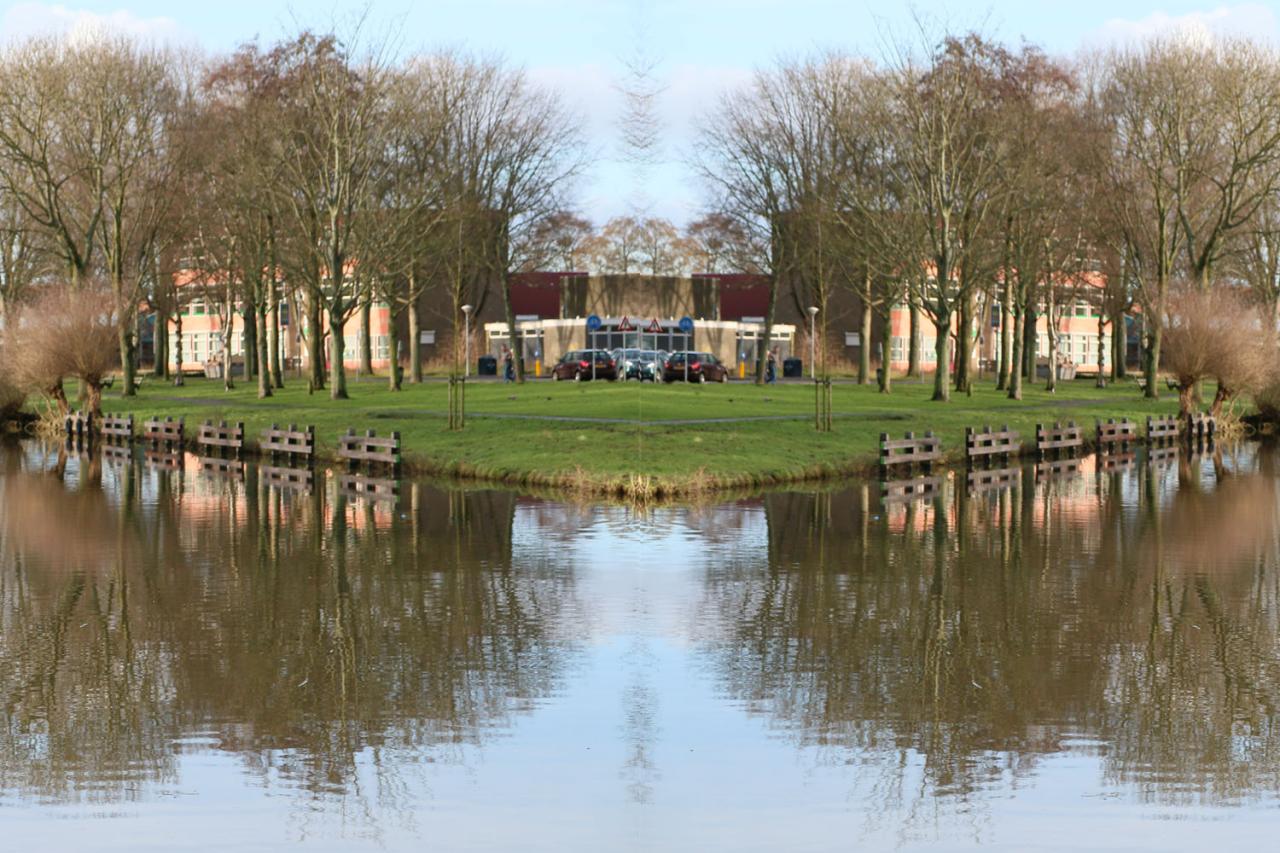
The mirror effect in Photoshop can be applied to various types of images, including photographs, graphics, and artwork. It is commonly used in design, digital art, and photo manipulation to create unique and eye-catching visuals. By flipping the image along its axis, the mirror effect can produce interesting symmetries, patterns, and reflections, adding depth, harmony, and visual interest to the composition.
In addition to creating a straightforward mirror image, Photoshop offers advanced tools and techniques to modify and enhance the mirrored result. These include adjusting opacity, blending modes, adding effects, or combining multiple mirrored layers to achieve complex and creative outcomes.
The Photoshop mirror effect provides a powerful creative tool for artists, designers, and photographers to explore new possibilities and experiment with symmetrical compositions and visually captivating designs.
How do you build a mirror picture with Photoshop
It’s quite simple to mirror images in Photoshop. Here are two methods to do it:
1. Flip Canvas
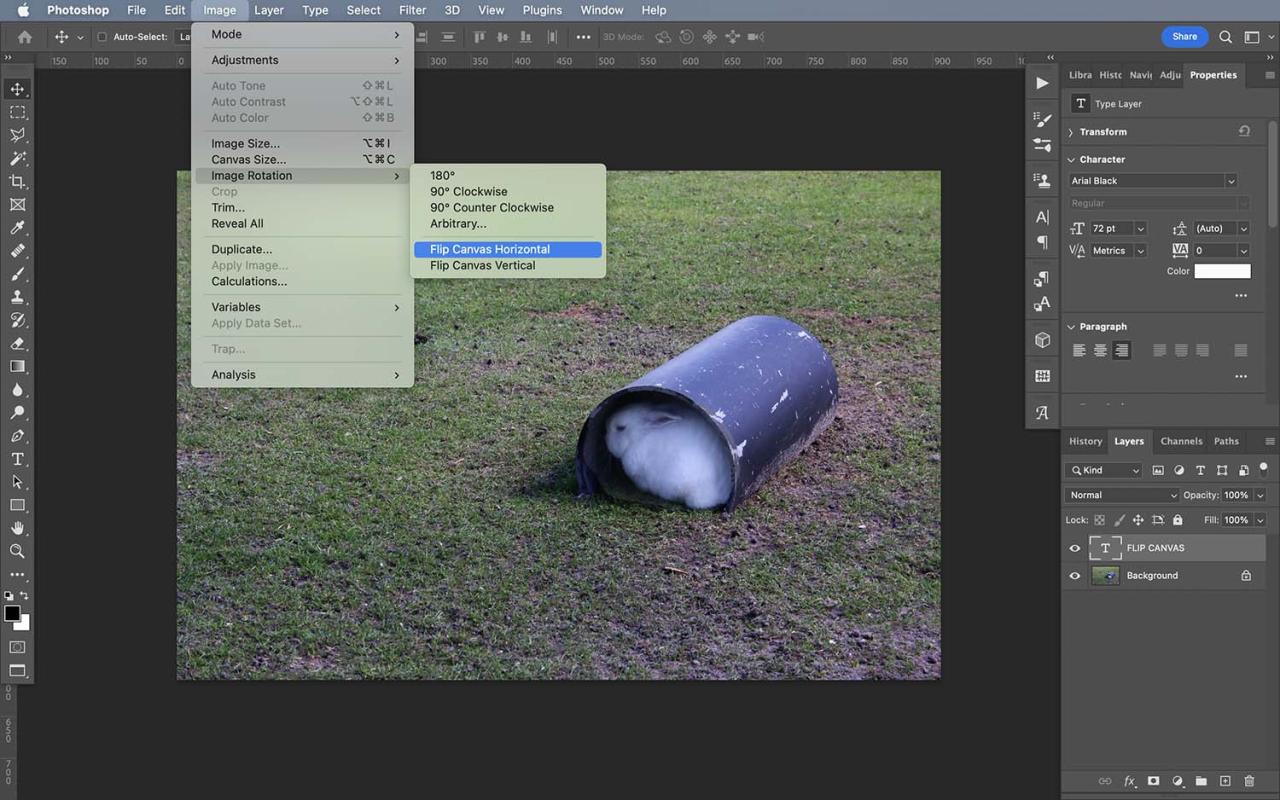
This function is useful when you need to mirror a single layer document for example, the JPEG. It’s also helpful if you’d like to flip the layer of the same document in one go.
Simply select the Image > Rotation>Flip Canvas Horizontal or Flip Canvas Vertical. (The direction you select is based on the effect you want to create.)
If you’d like to mirror one layer apart from the rest, refer to the following technique:
2. Flip
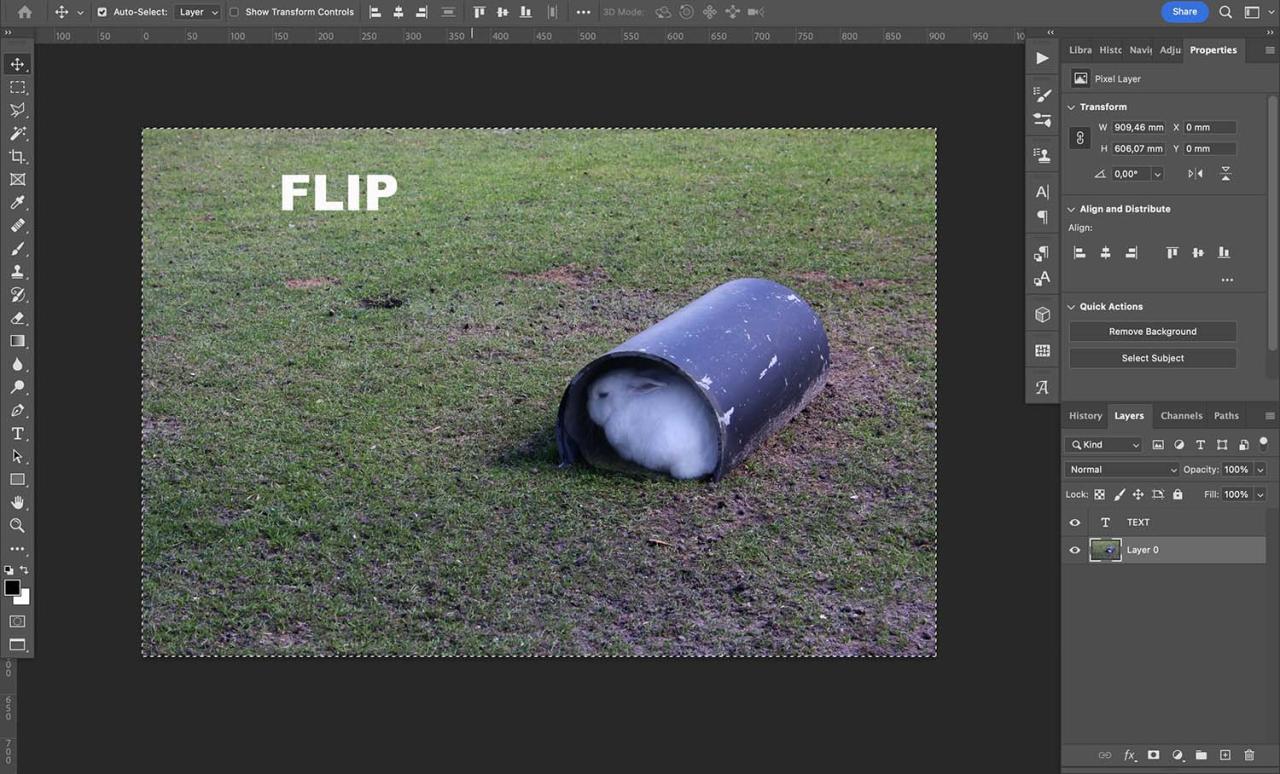
This method is different than that of the Flip Canvas option mentioned above since it lets you mirror each of the layers.
Then select the layer you want to flip. Then, select the content by pressing keys Ctrl/Cmd+A. Alternately, select the Select >Select All.
Select the Edit option, then Transform and Flip Horizontal or Flip Vertical..
You can also tap the keys Ctrl/Cmd+T. The ants marching around the list will disappear while a line with rounded handles both side will be displayed at their places (indicating it is it is the Transform tool is working).
Click right-click on the image to display the menu. Select the option to Flip Horizontal as well as the Flip Vertical option.. To save the effect, click on the checkmark on in the upper right corner of your window.
You can also accomplish this using a single layer document. Once you’ve opened your photo in Photoshop The Transform tool won’t be accessible since the layer is locked. You can however unlock this layer simply by pressing (or by double-clicking) at the lock symbol located on the right-hand side. It will display a dialog box that allows you to rename the layer. Select OK and then proceed with the remaining steps exactly as if working with multiple layers.
Reflections of mirrors: A step by step illustration
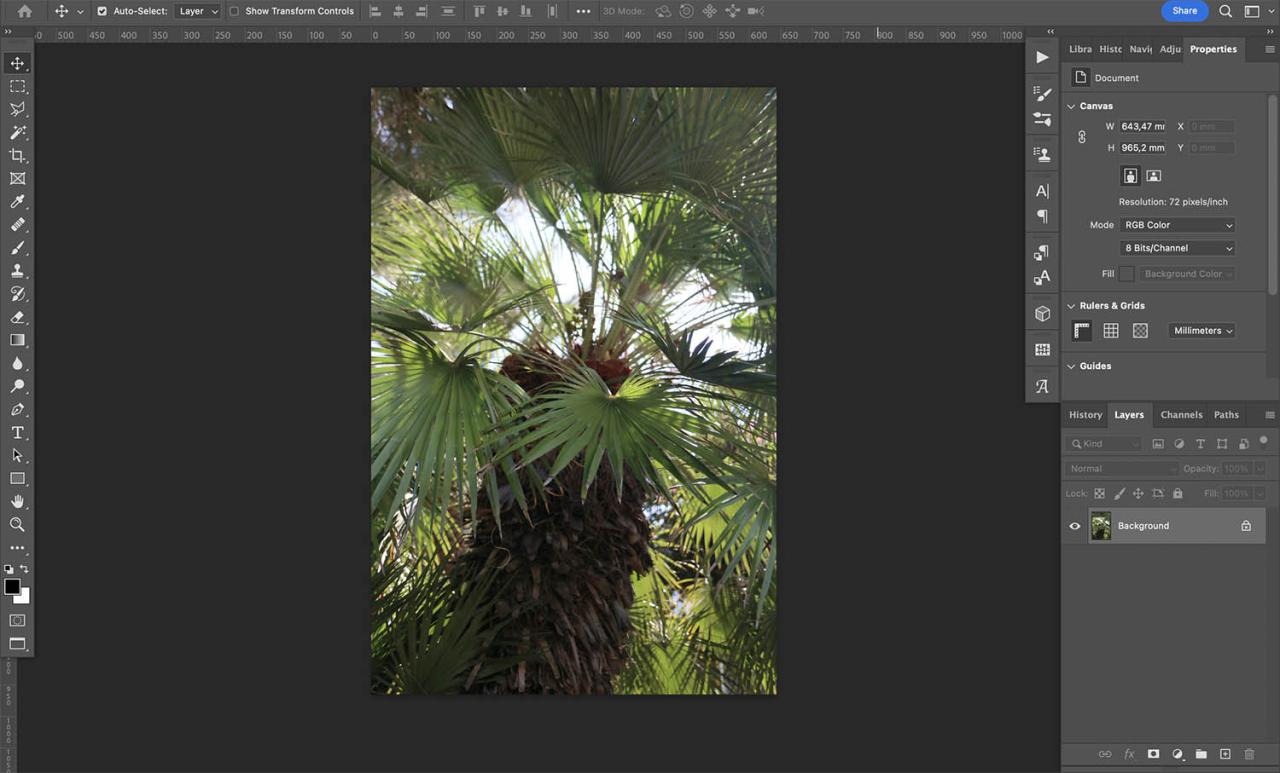
Begin by opening the image within Photoshop. You can select any image but if it has a clear pattern it will usually yield more effective outcomes. Abstract images are great also. In this instance I’m using a picture from a palm tree. It was taken from the below:
Once you’ve opened your picture it will show like a closed layer referred to “Background” (see an illustration above). To make fascinating mirroring effects you must unlock the layer. Double-click on the image layer in the Layers panel. This will display an dialog box in which you can change the name of the layer as follows:
I’d recommend using the term Layer 1 because, in a few minutes, you’ll make another layer that will be placed under it. You could also label this layer “Original” or select a name that’s more meaningful to you.
After that, click “OK”. The layer has been unlocked and will be named after the one you choose.
Then, create a brand new layer empty by clicking the Create Layer icon located at near the top of the Layers panel, or by choosing Layer>New>Layer from the Photoshop menu. The new layer’s name should be “Background” as well as “Layer 0” – whichever you prefer. Drag this layer below the original layer.
It is necessary to expand the size of your canvas to allow enough space for mirror images. Select Canvas Size > Image:
The most common method to make mirroring patterns is by using four variations of the original image. (You flip it over one axis and then flip it over on one side, and then on the opposite.) In order to do this efficiently it is necessary to double the dimensions of your canvas horizontally and vertically.
Then change to change the Canvas Size units to Percent. Enter “200 percent” into the Heightand and Heightboxes. Select “OK.
Click on your foreground layer and drag it to one of the corners of your canvas. (Pick the corner that is most appropriate according to how you would like your pattern to appear.) I would like for the tree’s trunks join at the center, while covering borders with foliage so I’ll move the picture towards the upper right corner:
Then you must duplicate the layer and flip it. Do this by moving it onto it’s new layer icon located at near the top of the panel, or choosing the Layer menu and selecting Duplicate the Layer.
Then, select your duplicate layer pressing Ctrl/Cmd+A. Then select Edit>Transform>Flip Horizontal.
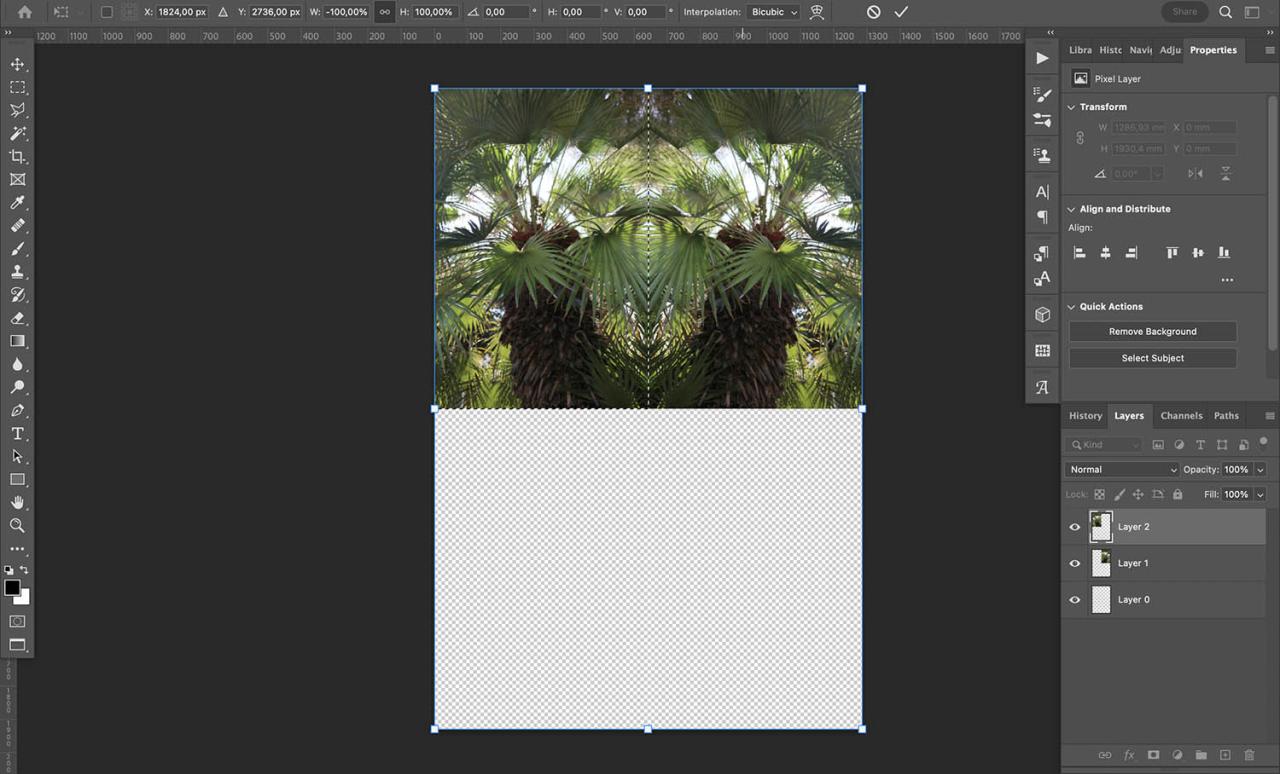
You’ll now have a mirror layer that it is possible to drag into the corner that is opposite the layer you were previously on:
Then, go to the Layers panel and choose the two layers. (To pick multiple layers press Ctrl/Cmdas when you click.)
Select “Layer>Duplicate Layers”. The Layer panel should be populated with four distinct images. With the two most recent layers selected, click the Edit tab, then Transform and Flip Vertical. Layers will be flipped then you are able to drag them around to over the remainder of the canvas.
That’s it! You’ve created a pattern by using mirror images. To make a larger pattern, just increase the size of the canvas and repeat the procedure. You can also increase the size of the pattern, and then use it with the Rotate tool to create an even more intricate image. Try various Blending methods also!
Tips: The greater number of layers that you have the more important it is to maintain the Layers panel neat and tidy. This is why it’s important to name your layers as you make them. It is also possible to combine or group the layer as you move.


